> For the complete documentation index, see [llms.txt](https://docs.akinon.com/llms.txt). Markdown versions of documentation pages are available by appending `.md` to page URLs; this page is available as [Markdown](https://docs.akinon.com/technical-guides/acc/acc-cli/acc-cli-tui.md).
# ACC CLI TUI
`akinoncli` opens a full-screen, keyboard-driven interface automatically when a command runs attached to a real terminal (TTY) without an explicit output format — for example, bare `akinoncli` or `akinoncli project list`. Passing `-o json`, `-o yaml`, or `-o table`, or running outside a TTY (CI, piped output), always falls back to plain CLI output instead — see `ACC_CLI_DOCS.md`.
**Supported platforms**: any terminal emulator on macOS, Linux, or Windows that supports a TTY and ANSI/truecolor escape codes.
## Navigation
Every screen in the TUI follows the same rules, so once you've used one, you can drive all of them:
| Key | Action |
| -------------------------------- | --------------------------------------------------- |
| `↑` / `↓` or `Tab` / `Shift+Tab` | Move the selection in a list or between form fields |
| `Enter` | Open the selected item, or submit the current form |
| `Esc` | Go back to the previous screen, or close an overlay |
| `Ctrl+C` | Quit the TUI from anywhere |
| `/` | Search/filter, on any list screen |
Letter shortcuts (`C`, `E`, `D`, …) are case-insensitive — holding Shift doesn't change what they do. The one exception is the logs screen, where `g`/`G` are deliberately distinct (oldest/latest).
On any row that supports it, `Y` (or `Enter`) opens a copy-to-clipboard picker — select a field or the entire row and copy it without leaving the list:
## Home Menu
Launch `akinoncli` with no arguments (or with output not forced to `json`/`yaml`/`table`) and you land on the home menu — the hub for every resource the TUI manages. Jump straight to any section with its bracketed letter, or move the selection with `↑`/`↓` and press `Enter`.
| Key | Section |
| --- | ---------------- |
| `P` | Projects |
| `A` | Applications |
| `D` | Domains |
| `K` | Public keys |
| `U` | Users |
| `R` | Roles |
| `E` | Email identities |
| `S` | Switch account |
## Projects
This is the flow you'll use most: browsing projects, navigating into a project's apps, and deploying/inspecting them.
### Project List
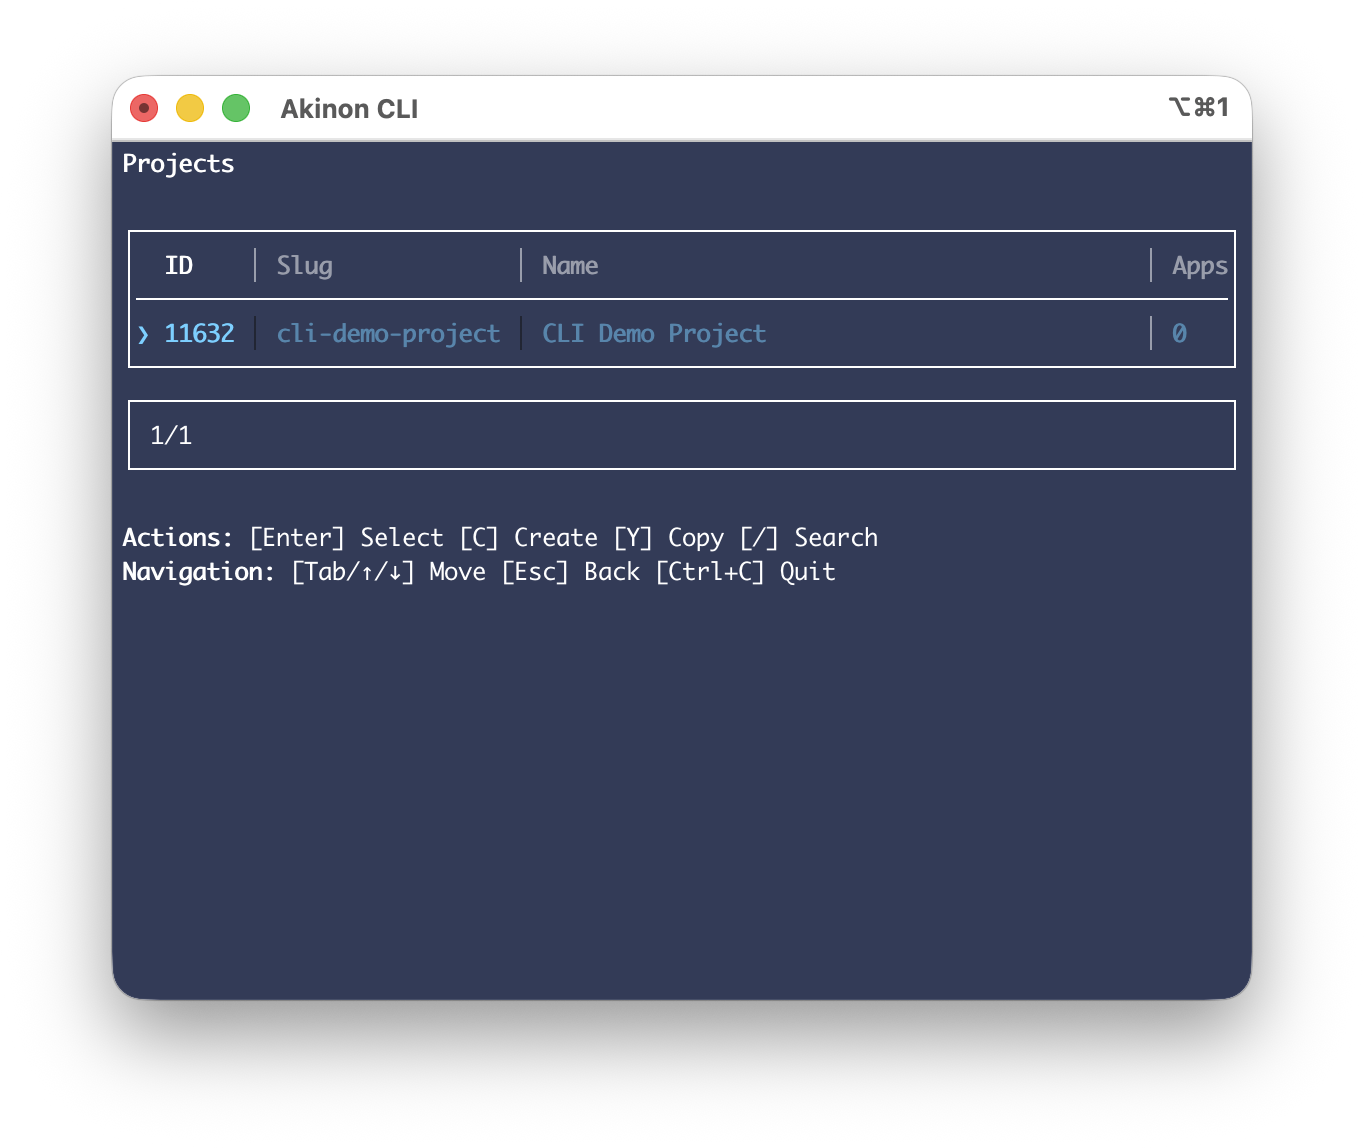
`project list` opens a scrollable, searchable (`/`) list.
### Project Detail
Pressing `Enter` on a project opens its detail screen — the project's metadata plus a table of every ProjectApp installed in it.
### Project Create
Press `C` from the project list to open a form for creating a new project.
Selecting a ProjectApp row provides the following options:
| Key | Opens |
| ------------------------------- | ---------------------------------------------------- |
| `D` | Confirm screen — redeploys the app's current version |
| `L` | **Logs** — shows the ProjectApp's logs |
| `M` | **Monitoring** — shows CPU/memory history charts |
| (from the app row) | **Env vars** — add/remove environment variables |
| `A` (in the certificate screen) | **Attach certificate** |
Press `Esc` to close any of these screens.
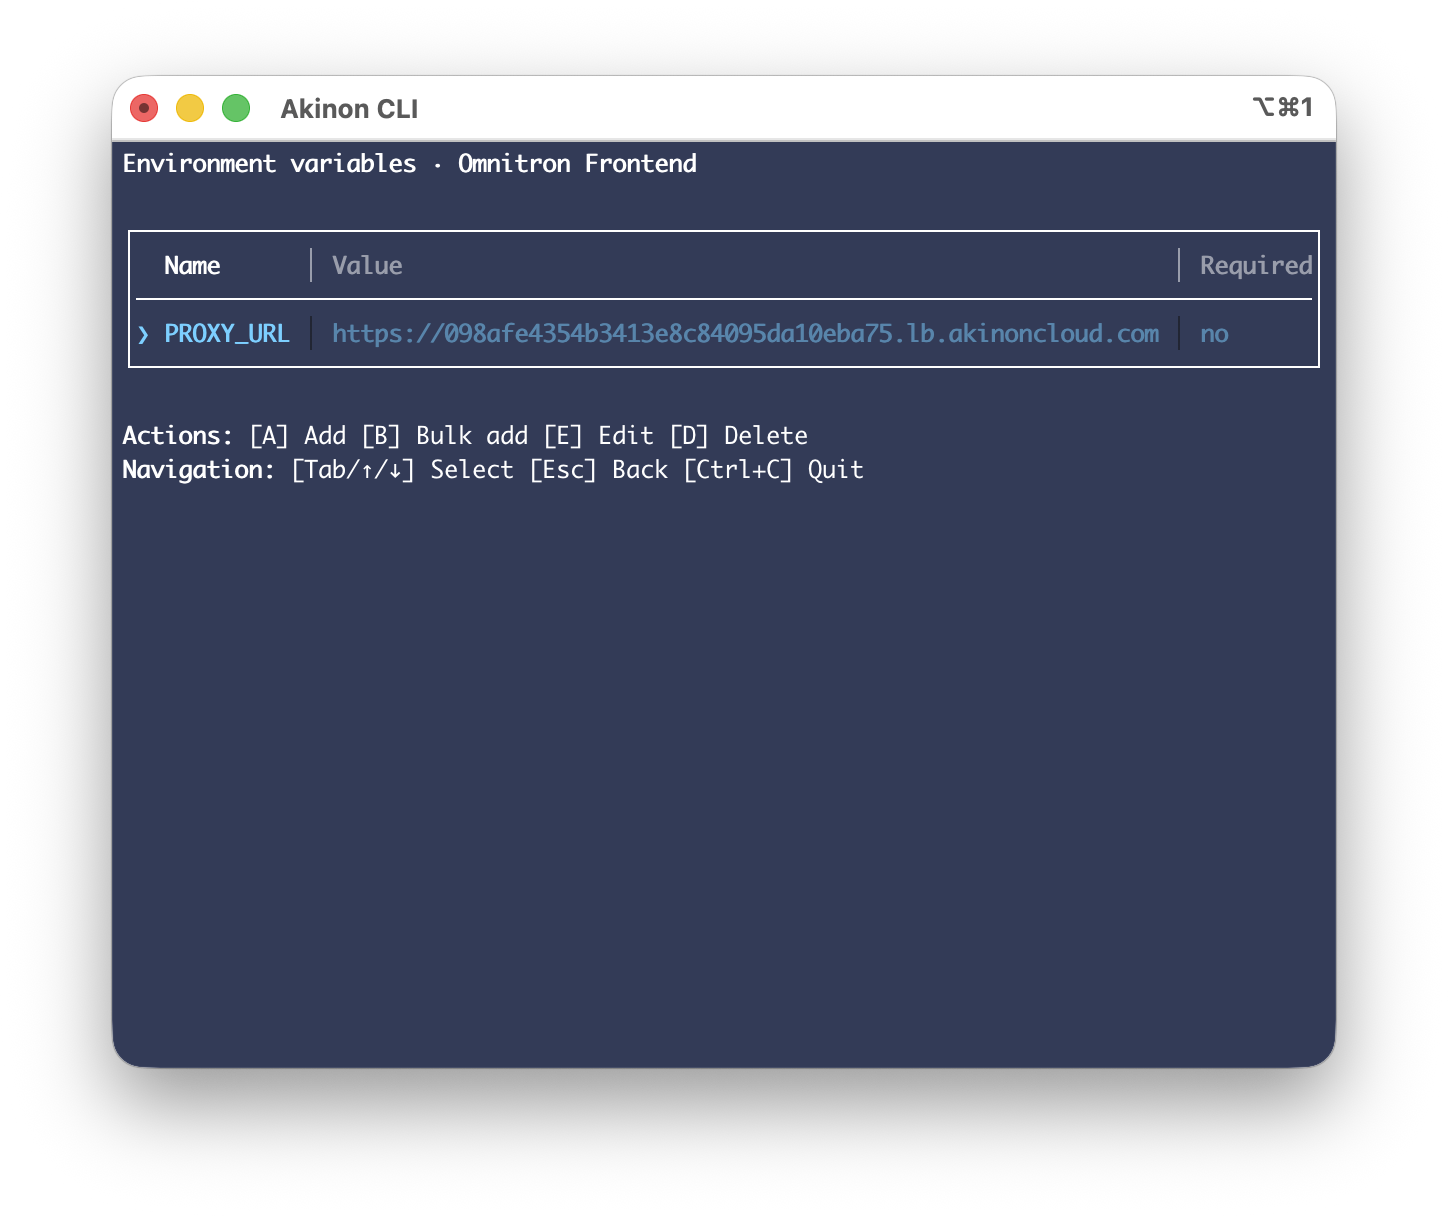
In the environment screen:
| Key | Action |
| --- | ------------------------------------------------------------------ |
| `A` | Add one variable at a time |
| `B` | Open a bulk-add form for pasting several `KEY=VALUE` pairs at once |
In the monitoring screen:
| Key | Action |
| --------- | --------------------------------------------------------------- |
| `T` | Choose the time range to display |
| `S` | Set the granularity — how many minutes apart each data point is |
| `R` | Set how often the view refreshes, in minutes |
| `↑` / `↓` | Switch which pod's charts are shown |
## Applications
Lists the applications you've developed.
| Key | Action |
| ------- | ------------------------------------------------ |
| `Enter` | Open its detail screen |
| `E` | Edit it |
| `R` | Open its build reports |
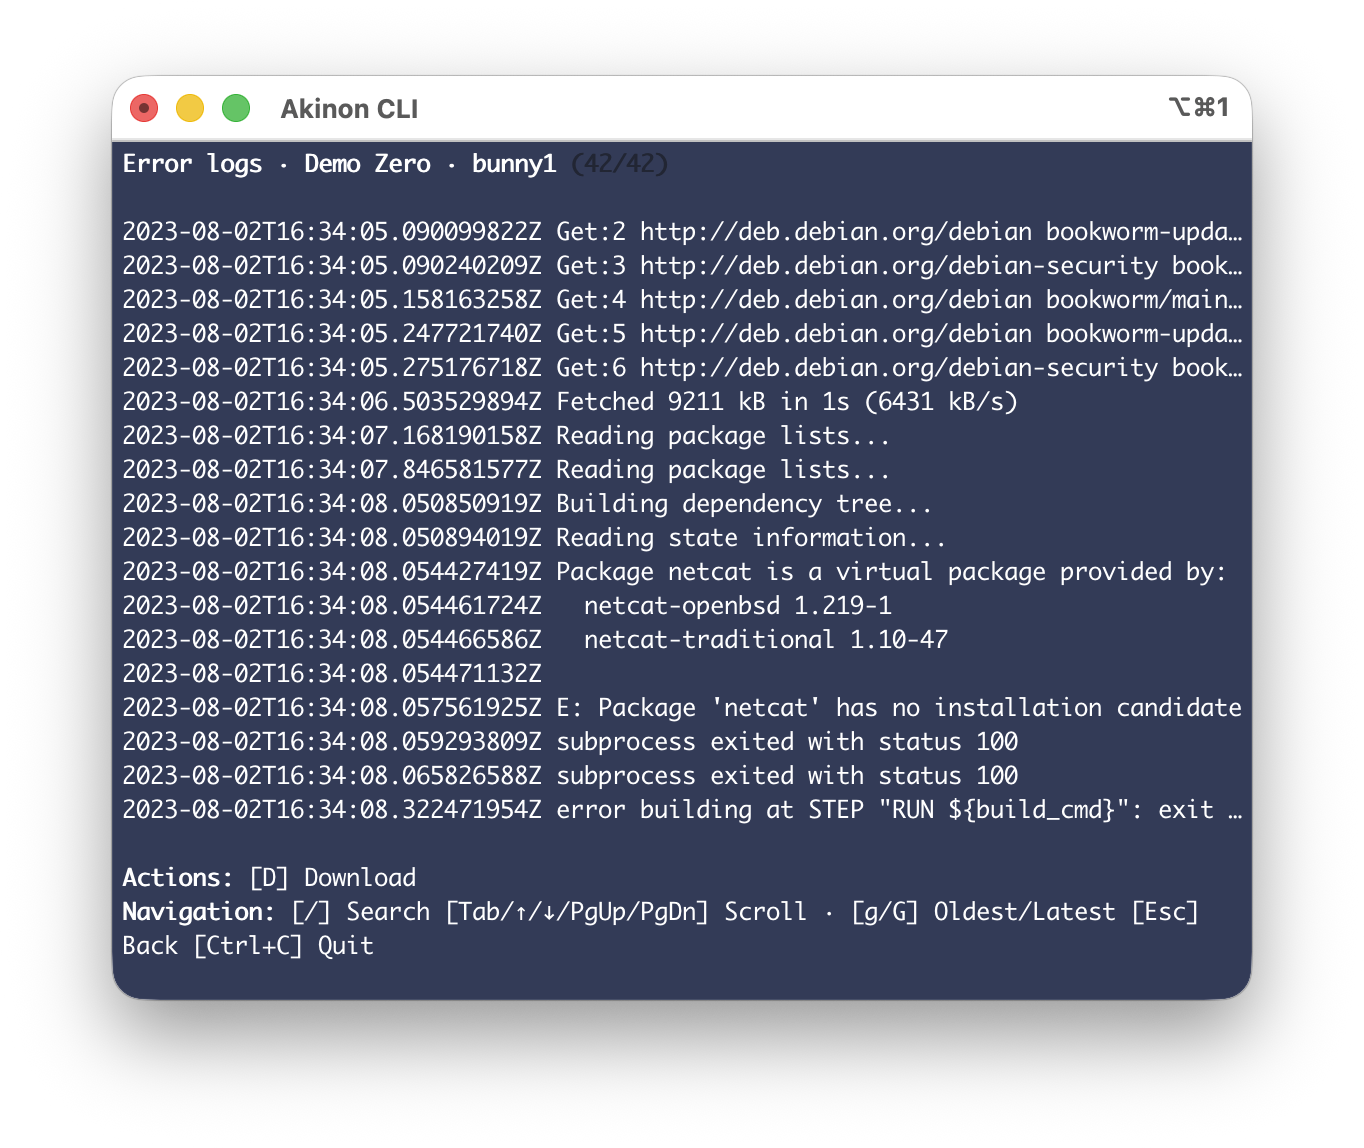
| `L` | Open the version/error logs for a specific build |
### Application Version
Shows an application's build versions, listed on its detail screen.
| Key | Action |
| --- | -------------------------------- |
| `S` | Mark the selected version stable |
## Domains
### Domain List
A domain's list screen lists its domains.
| Key | Action |
| ------- | ------------------------------------------------- |
| `C` | Create a new domain |
| `Enter` | Open the domain's detail and certificates screens |
### Domain Detail
A domain's detail screen show its certificate and DNS records.
### Domain Create
Press `C` for creating a new domain. The form asks for the hostname and whether the domain is managed by ACC or Client. If managed by ACC, the DNS records are automatically created and managed by ACC. If managed by Client, the DNS records must be manually created and managed by the client.
| Key | Action |
| ----------------- | ------------------------------------------------- |
| `Tab` / `↑` / `↓` | Switch between the hostname and managed-by fields |
| `←` / `→` | Toggle managed-by while that field is focused |
| `Enter` | Create the domain |
| `Esc` | Cancel |
## Public Keys
`publickey list` lists the created public keys in your account.
| Key | Action |
| --- | ---------------------------------------------- |
| `C` | Create a new public key |
| `D` | Delete the selected public key |
| `Y` | Copy a field or the whole row to the clipboard |
### Public Key Create
Press `C` from the public keys list to create a new public key.
| Key | Action |
| ----------------- | --------------------------------------- |
| `Tab` / `↑` / `↓` | Switch between the label and key fields |
| `Enter` | Create the public key |
| `Esc` | Cancel |
## Users
`users list` lists the users on the active account.
| Key | Action |
| --- | ---------------------------------------------- |
| `C` | Create a new user |
| `D` | Delete the selected user |
| `Y` | Copy a field or the whole row to the clipboard |
### User Create
Press `C` for creting a new user. The form asks for the username, email, and role.
| Key | Action |
| ----------------- | ------------------------------------------ |
| `Tab` / `↑` / `↓` | Switch between fields |
| `←` / `→` | Cycle the role while that field is focused |
| `Enter` | Create the user |
| `Esc` | Cancel |
## Roles
`roles list` lists the roles on the active account.
| Key | Action |
| --- | ---------------------------------------------- |
| `D` | Delete the selected role |
| `Y` | Copy a field or the whole row to the clipboard |
## Email Identities
`emailidentities list` lists the verified email identities on the active account.
| Key | Action |
| ------- | ---------------------------------- |
| `C` | Create a new email identity |
| `D` | Delete the selected email identity |
| `Enter` | View email identity details |
## Switching Accounts
`S` from the home menu (or `account switch` from the CLI with no argument) opens an interactive picker over every account you're a member of.
---
# Agent Instructions
This documentation is published with GitBook. GitBook is the documentation platform designed so that both humans and AI agents can read, navigate, and reason over technical content effectively. Learn more at gitbook.com.
## Querying This Documentation
If you need additional information that is not directly available in this page, you can query the documentation dynamically by asking a question.
Perform an HTTP GET request on the current page URL with the `ask` query parameter, and the optional `goal` query parameter:
```
GET https://docs.akinon.com/technical-guides/acc/acc-cli/acc-cli-tui.md?ask=&goal=
```
`ask` is the immediate question: it should be specific, self-contained, and written in natural language.
`goal` is optional and describes the broader end goal you are ultimately trying to accomplish on behalf of the user. GitBook uses it to tailor the answer towards what is most useful for that goal.
The response will contain a direct answer to the question and relevant excerpts and sources from the documentation.
Use this mechanism when the answer is not explicitly present in the current page, you need clarification or additional context, or you want to retrieve related documentation sections.